Are these not the cutest DIY Holiday Photo Coasters you’ve ever seen? Learn how to make these yourself, give them as a Christmas gift, or keep them on your own coffee table.

How to make your own coasters
By now, the stress of the holiday season may be setting in. Your hands are clammy, your brow is knit and you just can’t imagine how you’ll finish all of your holiday shopping and still have time to enjoy the season. The good news is that it doesn’t have to be this way! Grab a glass of eggnog, put on your favorite Christmas movie, and get ready to finish all of your gift-giving prep in one night with this DIY holiday photo coasters tutorial.

DIY Holiday Photo Coasters
Here’s how you can turn all of your favorite photos into DIY photo coasters to give away to family and friends:
Supplies
- family photos or holiday photo cards
- cork board
- scissors
- Pen or pencil
- paintbrush
- ModPodge gloss sealant
- something circular (like a glass or jar lid) to trace

Step 1: Ensure all photo cards are cut to the same size
Begin by making sure all of your images are the right size and shape. If you’re using photos, that means you’ll start by placing the circular object on top of them. Trace the circle, then cut it out so your photos are the size and shape that you want your coasters to be! My holiday cards were already round so I was able to skip this step.
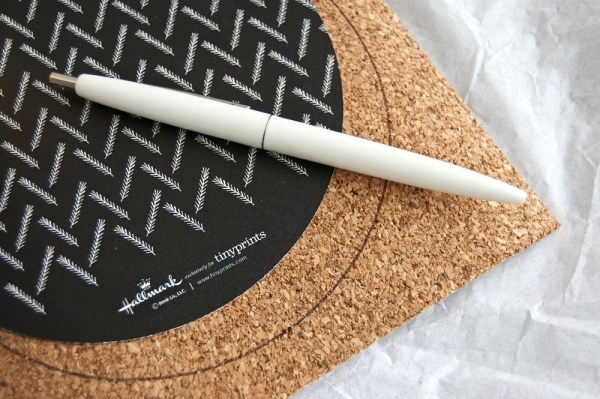
Step 2: Trace your photo coasters
Now that you have your images ready, it’s time to prepare the corkboard. Trace the same circular object onto your cork (if using circular cards, just trace those) and cut it out.

Step 3: ModPodge your drink coasters
With a paintbrush, spread a generous amount of ModPodge onto the cork base. When every bit is covered, place your image on top and press it down well. Place something flat and heavy, like a book, on top and wait for at least 20 minutes for this glue to dry. While you’re waiting, get started on the rest of your photos.

Step 4: Trim off the excess photo edges
After your first application of glue has dried, remove the books from on top of your coaster. If your image and cork base don’t exactly line up (as mine didn’t), trim away any excess.

Step 5: Glaze over the top of the photo coasters
Glaze the top of your coaster with more ModPodge by spreading a thin coat evenly over the image, and let it air dry for 15 minutes between each coat. I added two coats to mine. The image will look very blurry at first, but don’t worry — the glue dries into a nice clear gloss! Repeat these steps for as many homemade photo coasters as you’d like to make.

Enjoy these DIY holiday card coasters
My packs included three coasters, but you could really add as many as you’d like. You could even create themes amongst each pack depending on whom you are giving them to. When you’re all done, tie each set up with a beautiful ribbon before placing it under the tree or stuffing it into a stocking.
I just love these DIY holiday photo coasters, this is a wonderful way for you to recall the year fondly and to give a very personal gift to friends and family this holiday season. Have fun and enjoy this drink coasters tutorial!

Julia Marchand is a DIY blogger and vintage loving gal who is expecting her first child this year! When she is not sewing and crafting in her scenic New England home, she is writing about her creations for TinyPrints, her preferred site for customized photo cards. You can follow Julia on Twitter @jeezejulia.

Hi, Deanna!
Thank you so much for letting me be a part of your blog! This post was so much fun for me. I hope you love it!
All the best in the new year –
Julia